
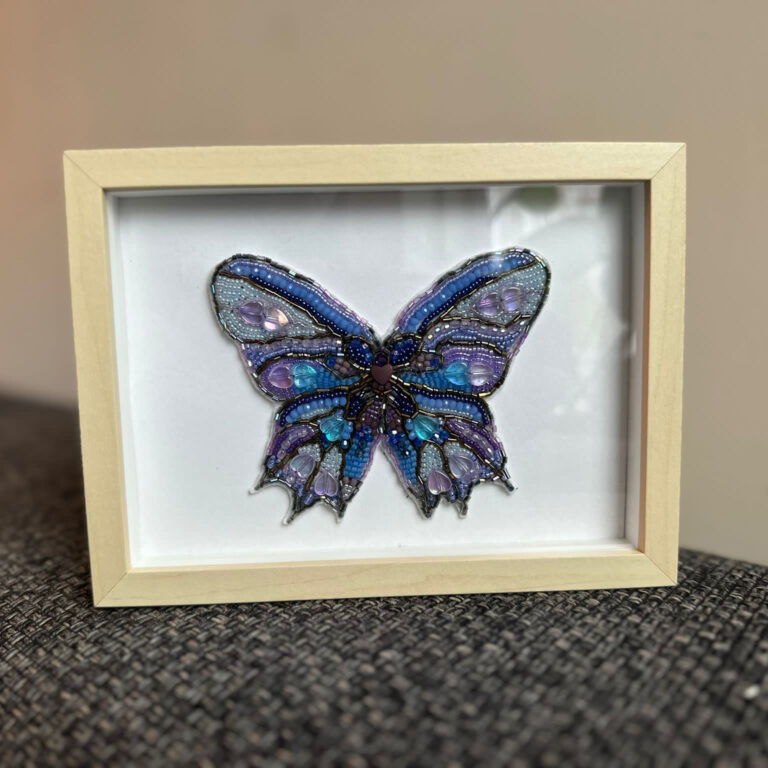
This weeks inspiration is from Femke. She made a beautiful embroidered butterfly and this is her story and explanation behind it:
For a friends birthday I knew I wanted to make her something special. I regularly make jewelry myself, which is of course also a very nice gift, but I wanted to get out of my comfort zone and try something different. Ultimately I did choose to work with beads, but how couldn’t I when I’m surrounded by so many beautiful beads at work every day 😉 .
The friend I made the gift for studied Biology and is therefore crazy about beautiful animals and insects.
I have often seen a framed butterfly for decoration, but I still find it a bit of a creepy idea. So I thought, why not a beaded embroidered butterfly? That is just as beautiful, or perhaps even more beautiful! 😉
I am very proud of the end result and am already thinking about making one for myself!
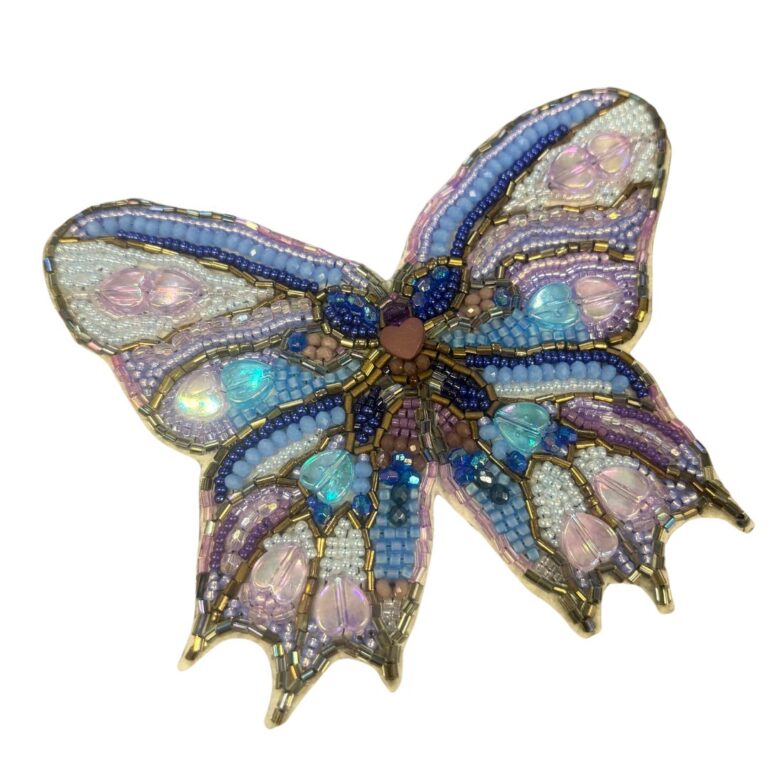
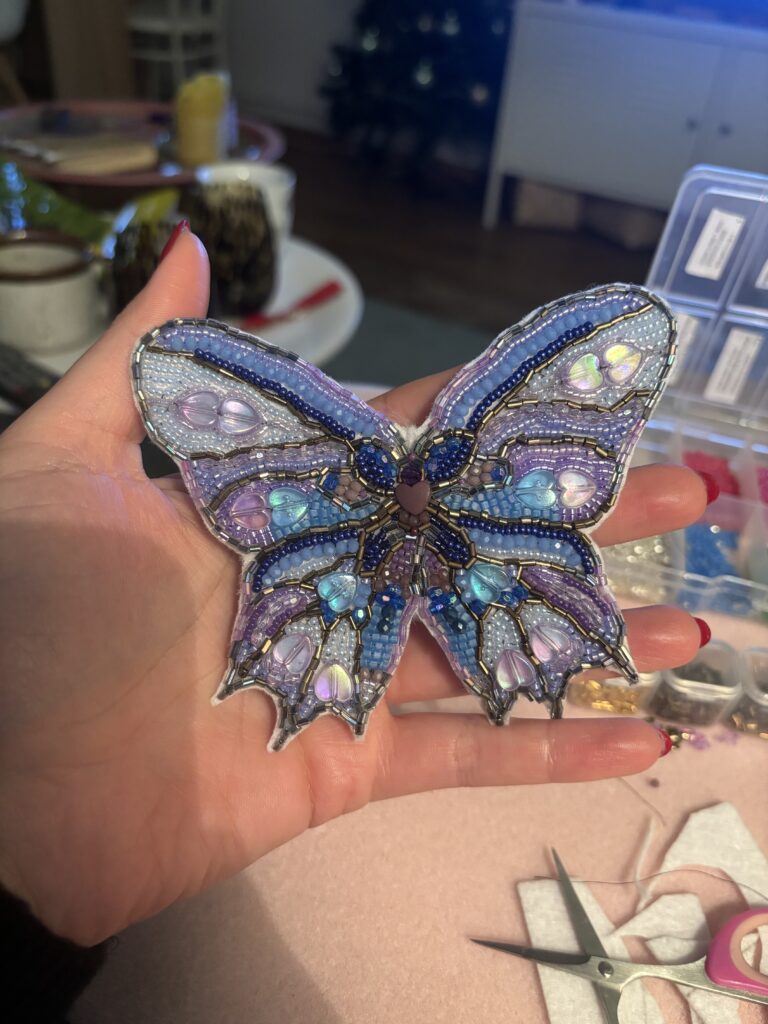
While making it I discovered that it works very well to use many different types and shapes of beads. So it is also an ideal project if you already have a nice supply of beads at home.
What I have used are:
– Miyuki seed beads 11/0
– Miyuki delicas 11/0
– Miyuki cubes 1.8 mm
– Miyuki bugles 3mm
– faceted beads 3 mm
– short irregular (budget) bugles
– Transparent acrylic heart beads
– Beading foundation 4.25×5.5 inches – white
– Fireline 0.10 mm
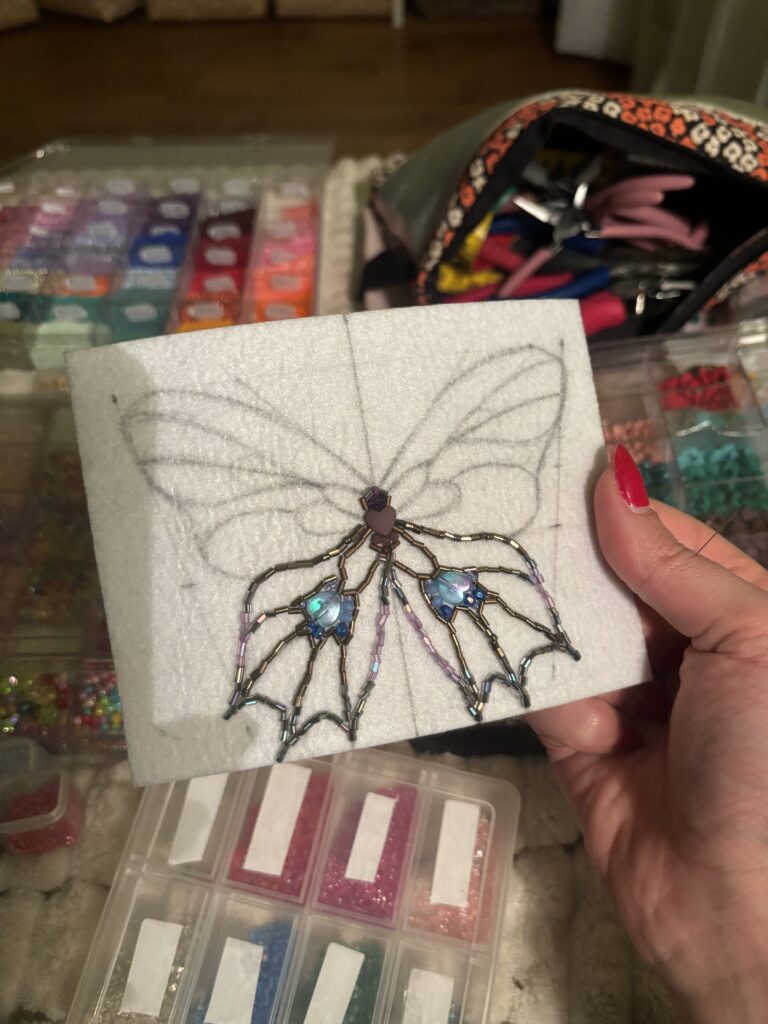
Before you start, you can find an example of a butterfly for the shape and colors. You then draw the shape and outlines on the beading foundation.
I started by embroidering the lines and then filling it in with beads. It is best to work in symmetry on both sides.
When it comes to embroidery itself, I don’t use a specific type of technique (I just try out a lot haha), but if I had to name it, I make variations and combinations of, for example, the ‘beaded back stitch’ and ‘beaded fly stitch’.
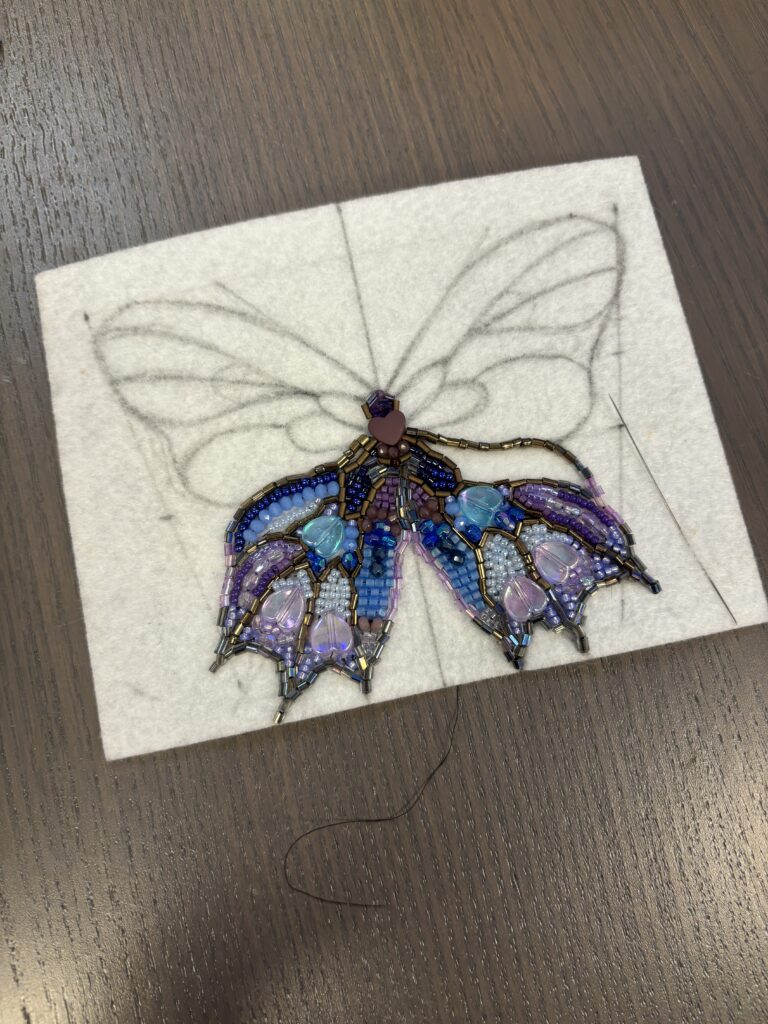
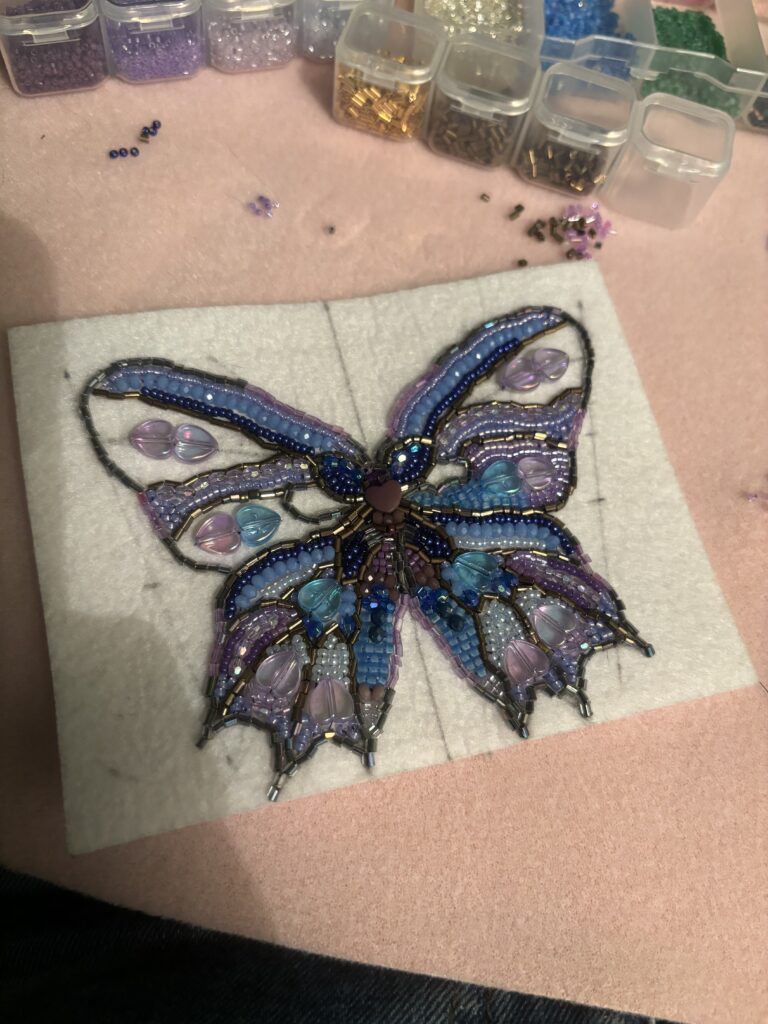
I carefully cut away the remaining beading foundation. Be careful not to accidentally cut the threads on the back.
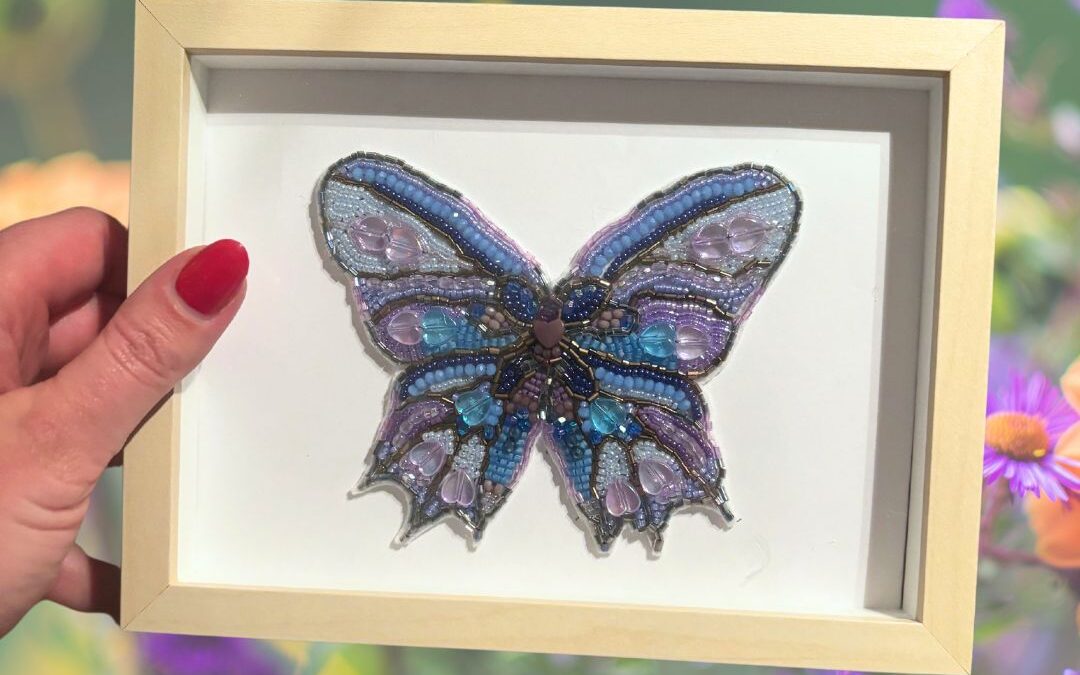
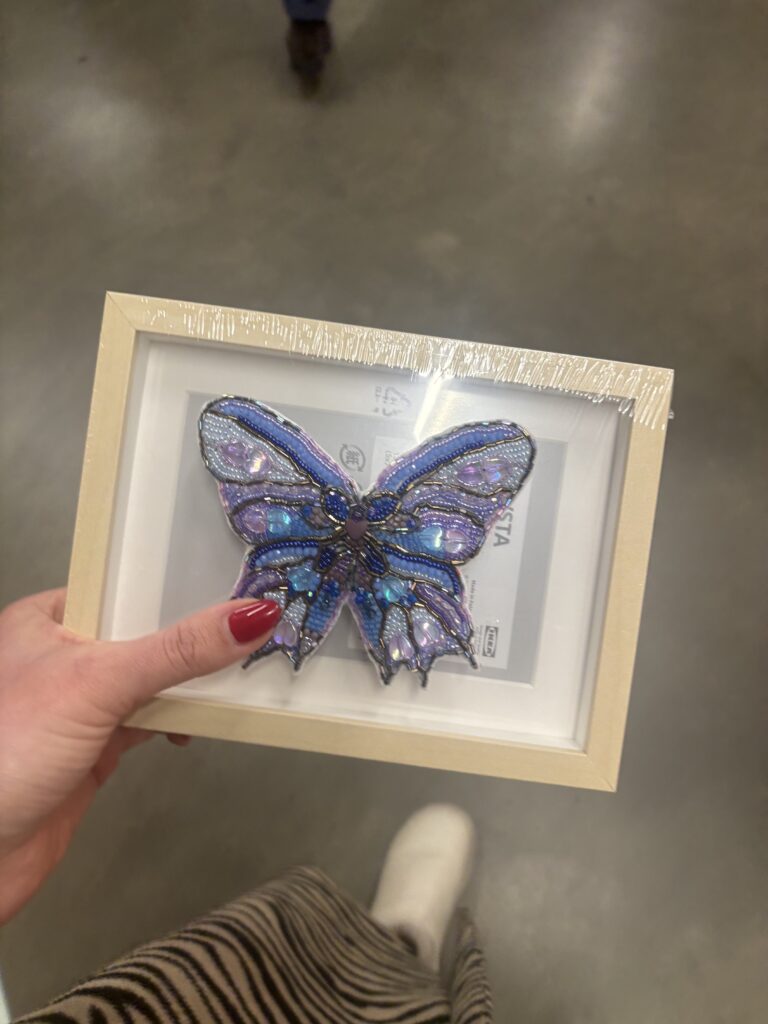
Now to present the butterfly in a matching photo frame. I found this at Ikea!
It is article HOVSTA 13 x 18 cm.
The ideal thing about this photo frame is that you can put the plastic ‘glass’ forward so that the butterfly has space in the frame and is not pressed behind the glass.
I glued the butterfly onto sturdy white paper with Hasulith glue. Allow this to dry for 24 hours before placing it upright.
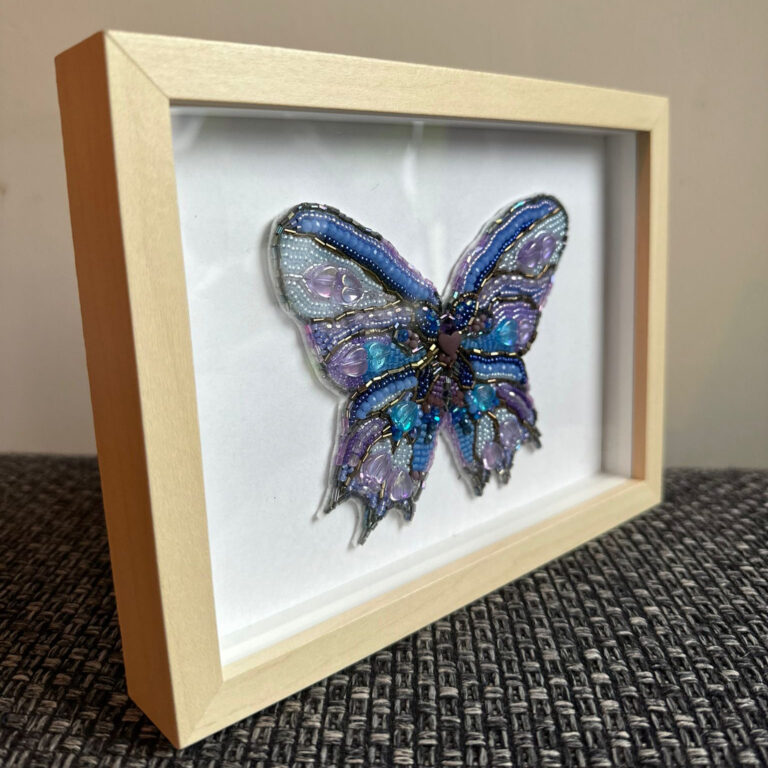
The gift was very well received and it will be a real eye-catcher in the interior!